If you’ve recently purchased a DSLR camera and don’t know how to use it, you’re in the right place!
A DSLR camera is great for food photography (or any photography, for that matter), but if you don’t know how to use it properly, you won’t be getting maximum benefit from it.
Being able to confidently use your camera in manual mode is so important when taking good photos. This blog post covers the three main DSLR settings: aperture, shutter speed and ISO, so you can graduate from your ‘auto mode’ days!
And don’t worry if you don’t know what any of those words mean – I’ll be explaining these three main settings along with some handy infographics to show you what happens when you change them.
So grab an iced latte or a mug of cosy masala chai and let’s get started!
Setting 1: Aperture
The first, and arguably most important, DSLR setting is aperture. This is defined as how wide your lens opens. The wider the lens opens, the more light is let into the camera.
You can change your aperture by changing the f-stop setting on your camera. A higher f-stop number e.g. f/22, represents a narrower aperture, meaning less light enters the lens. Likewise, a lower f-stop means more light comes in.
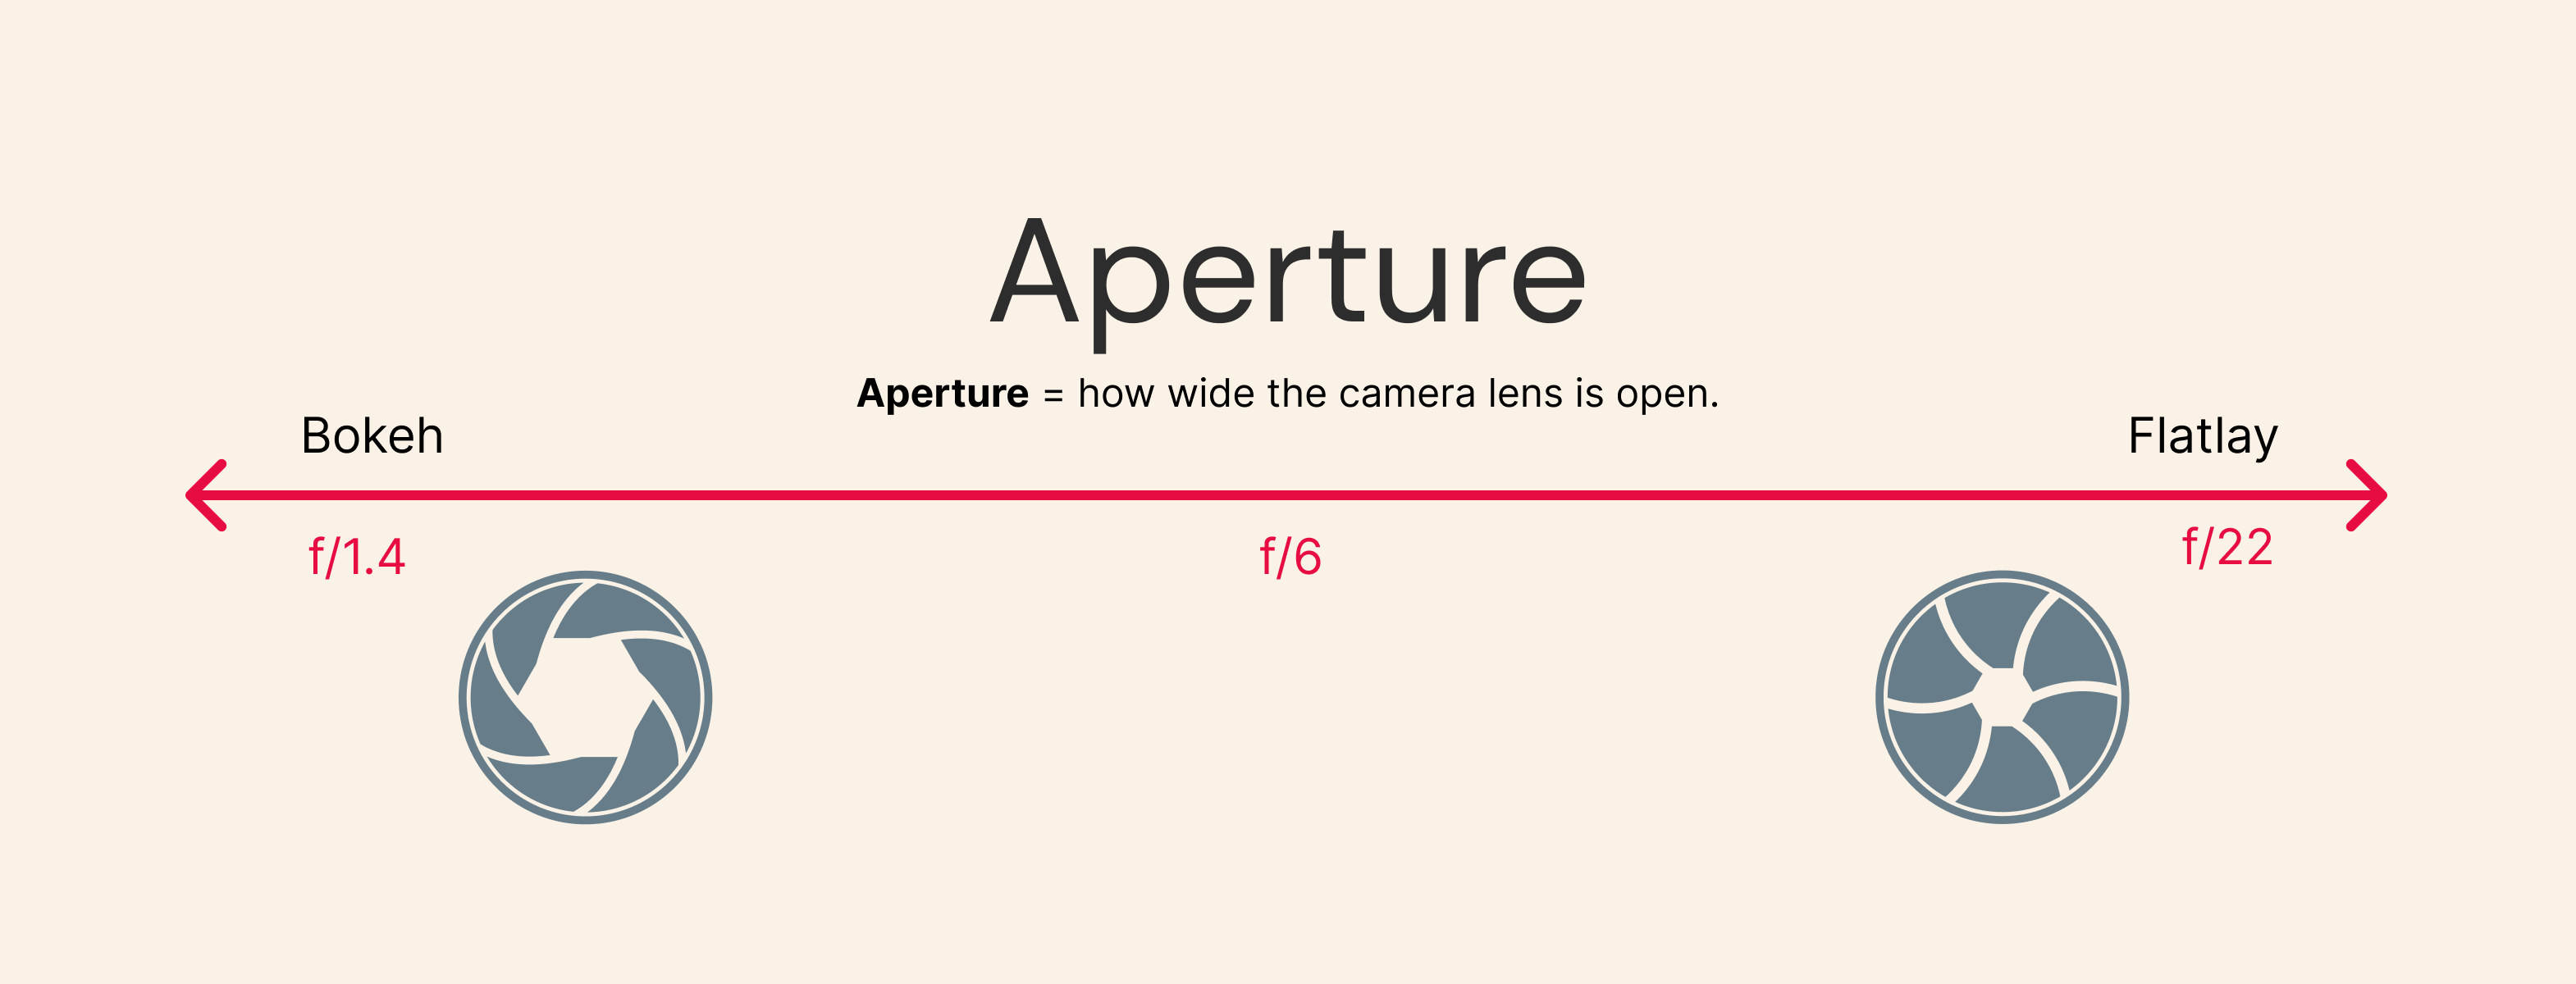
The range of the f-stop scale available to you is dependent on your camera lens. Most kit lenses have an aperture range from f/3.5 going down to f/22 or even lower in some lenses. A 50mm lens can have apertures as wide as f/1.4.
Tip: The lower the f-stop number, wider the aperture of the lens. This lets in more light creating a brighter photo.
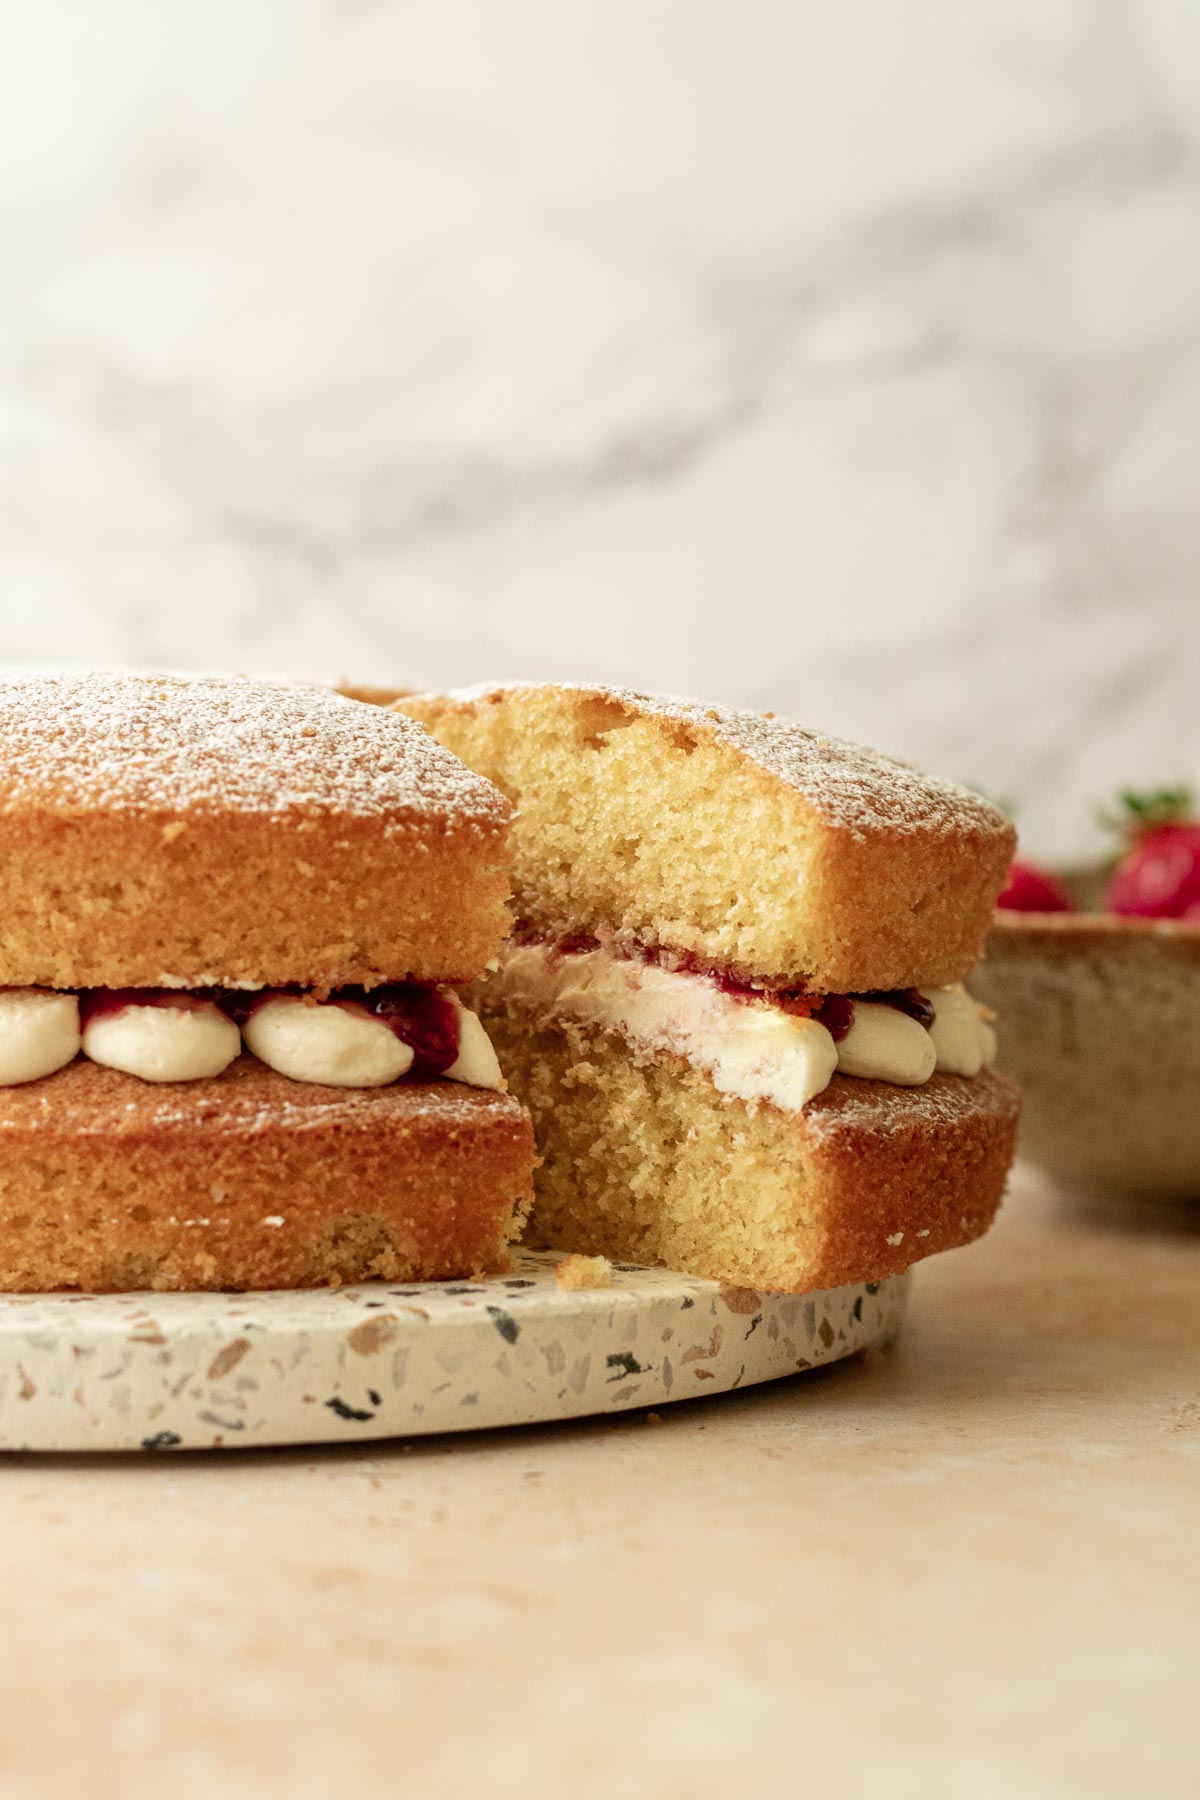
As you widen the aperture (by using a lower f-stop), you reduce the amount of picture in focus. This can be useful for creating bokeh: a dreamy, blurred background, like in the photo below of my Victoria sponge cake. Notice how the bowl of strawberries in the background is blurred?
As you’ll come to learn throughout this article, making any DSLR setting too high or low can come with caveats. If your aperture too wide, you run the risk of your subject not being in focus.
A narrow aperture is best for taking photos where you want your whole scene to be in focus, such as flatlays.
As the effect of changing aperture is mostly artistic, I always change the aperture first when setting up my camera. But more on this later.
Setting 2: Shutter Speed
The second setting to understand when using a DSLR is shutter speed. Shutter speed is a measure of how long the shutter is open when you are taking the photo.
Shutter speed is measured in fractions of a second e.g. 1/200th of a second. The slower the shutter speed, the longer the shutter is open and hence the brighter the photo.
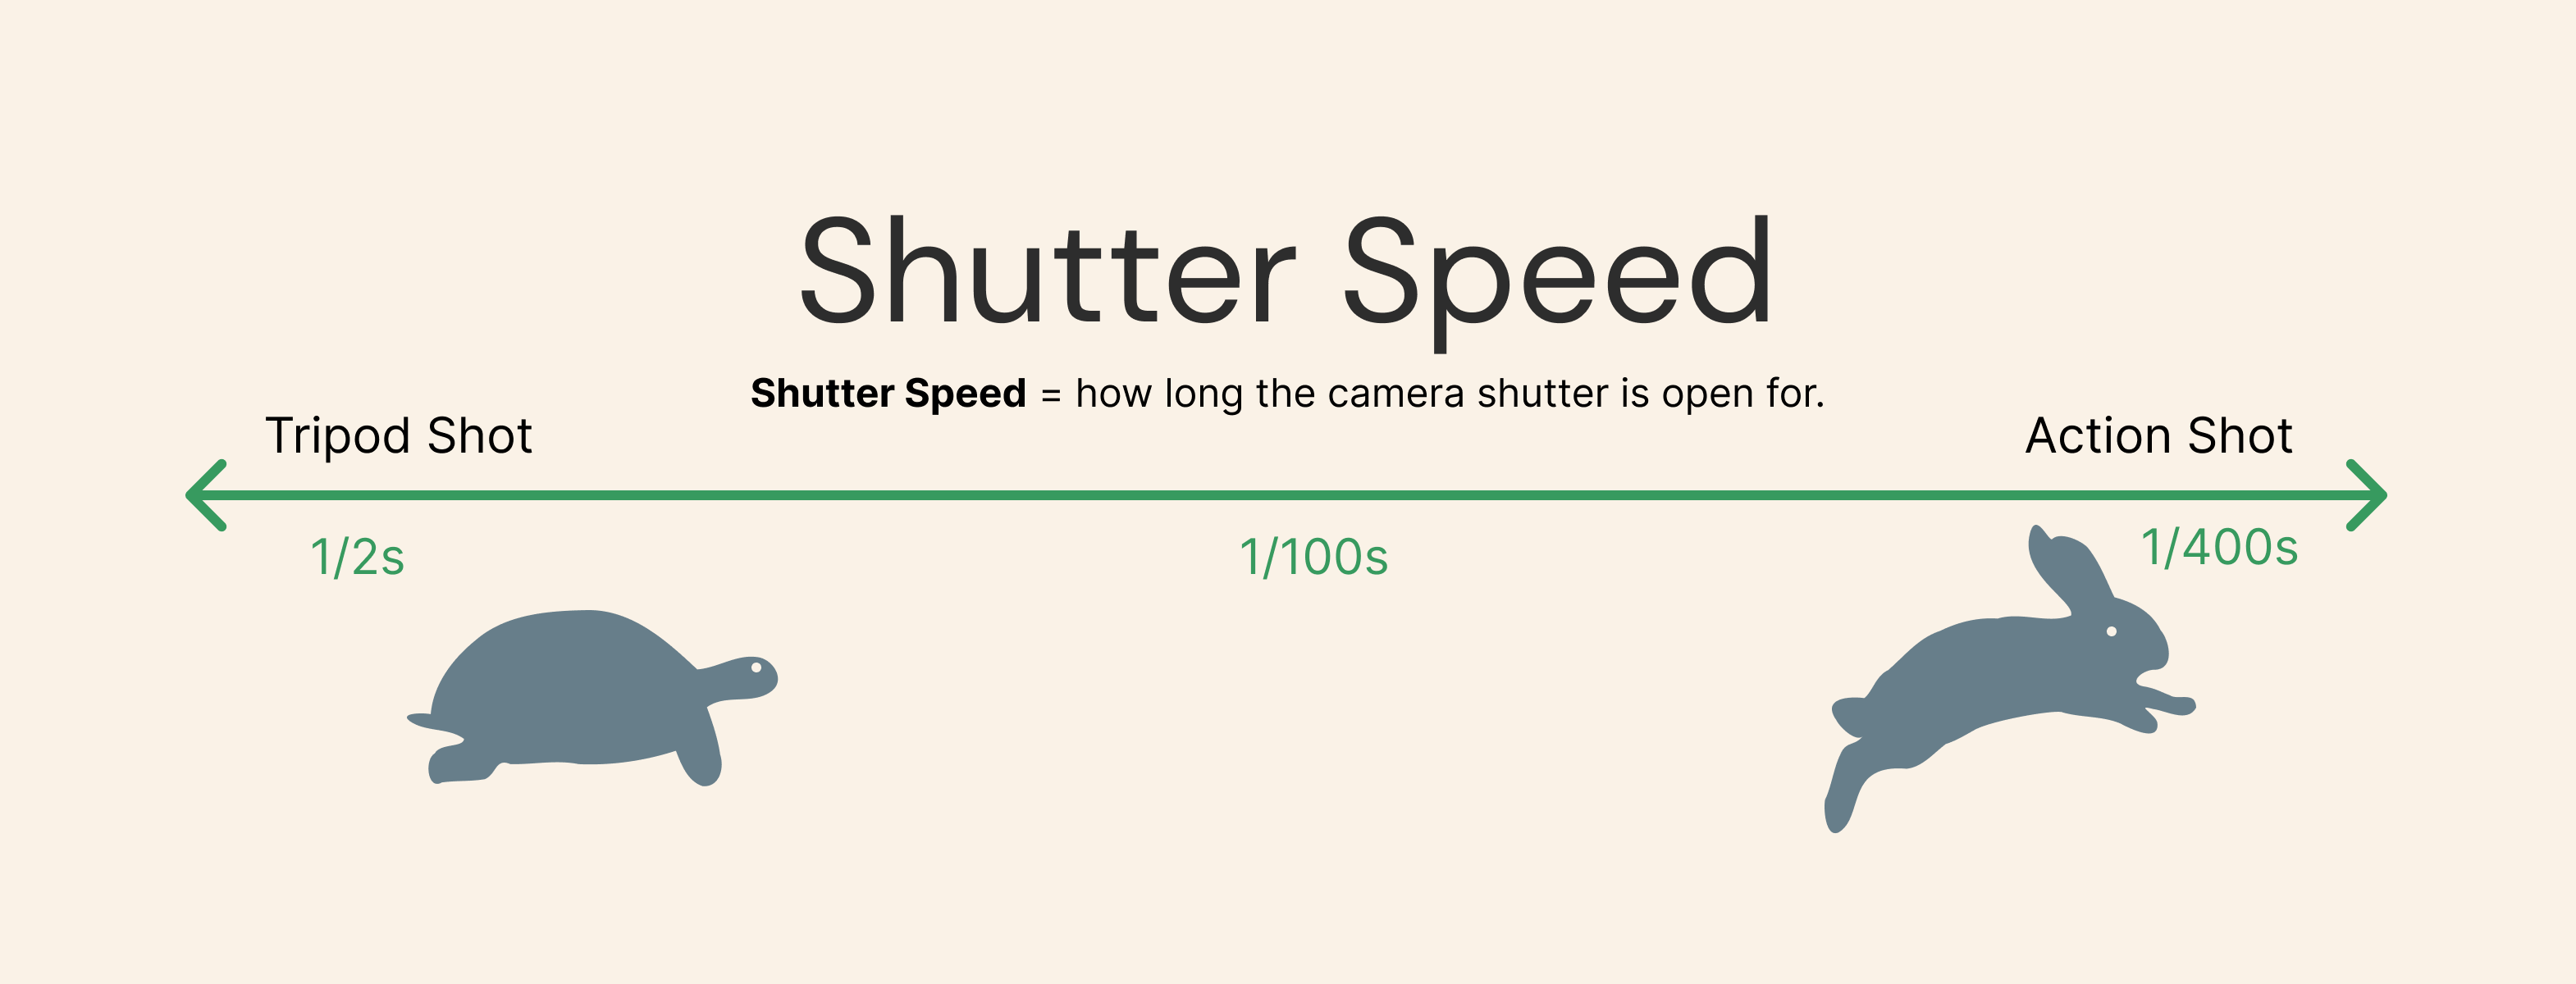
When shooting manually, you’ll want to keep your shutter speed fast (no slower than 1/80th of a second). This is to minimise blurriness caused by shaky hands. However, if you are using a tripod, you can use a fairly slow shutter speed (1/4 to 1/2 s) as your camera is stationary when taking the photo.
When is a really fast shutter speed necessary?
If you are taking action shots or capturing movement, perhaps of syrup being drizzled onto some pancakes, you’ll want to use a fast shutter speed whether you are using a tripod or not. This is because we want to capture that split second when the syrup is being poured as sharply as possible. If our shutter speed is too slow in this case, we will simply get a blurred image.
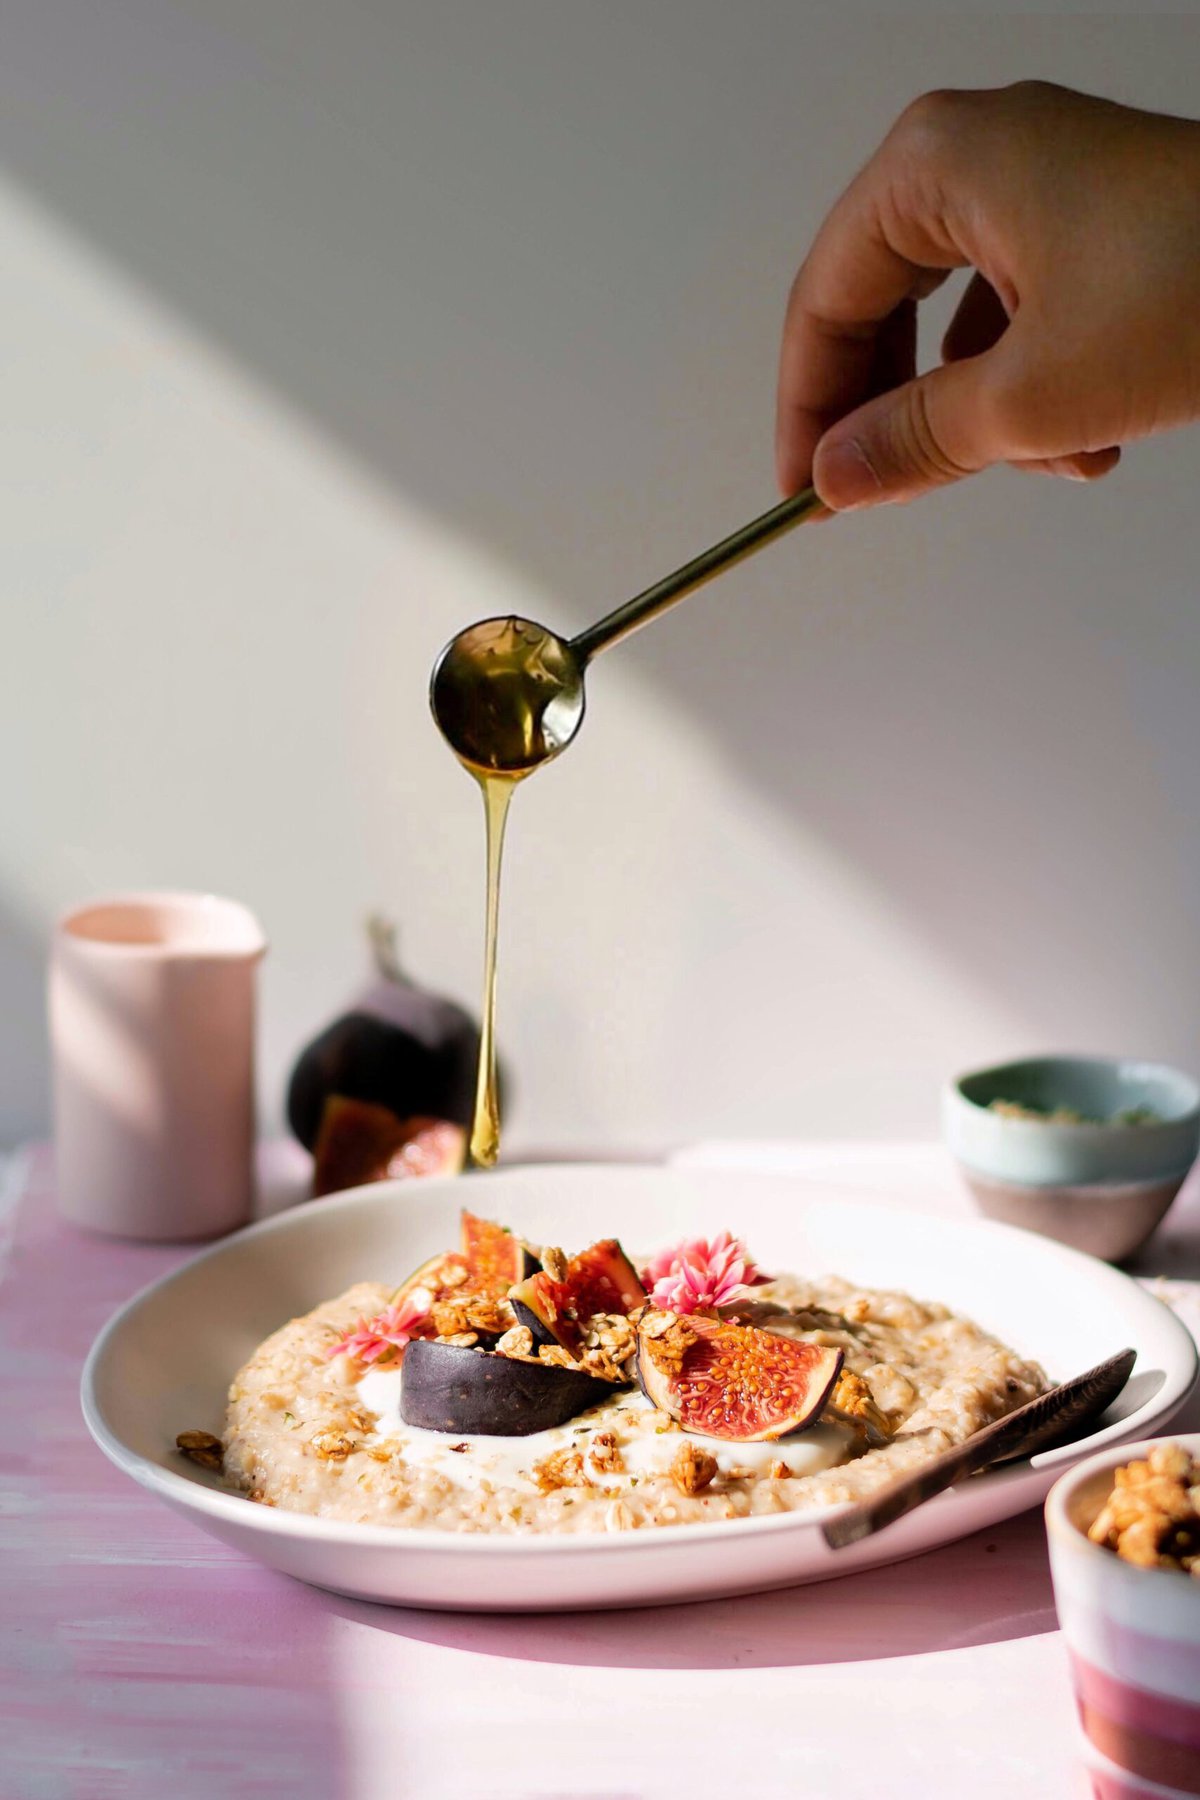
In the photo below, I used a fast shutter speed to capture the action of the honey being drizzled on the oatmeal.
Setting 3: ISO
ISO is the final setting you need to understand DSLR basics. And you’ll be pleased to hear it’s the easiest to understand!
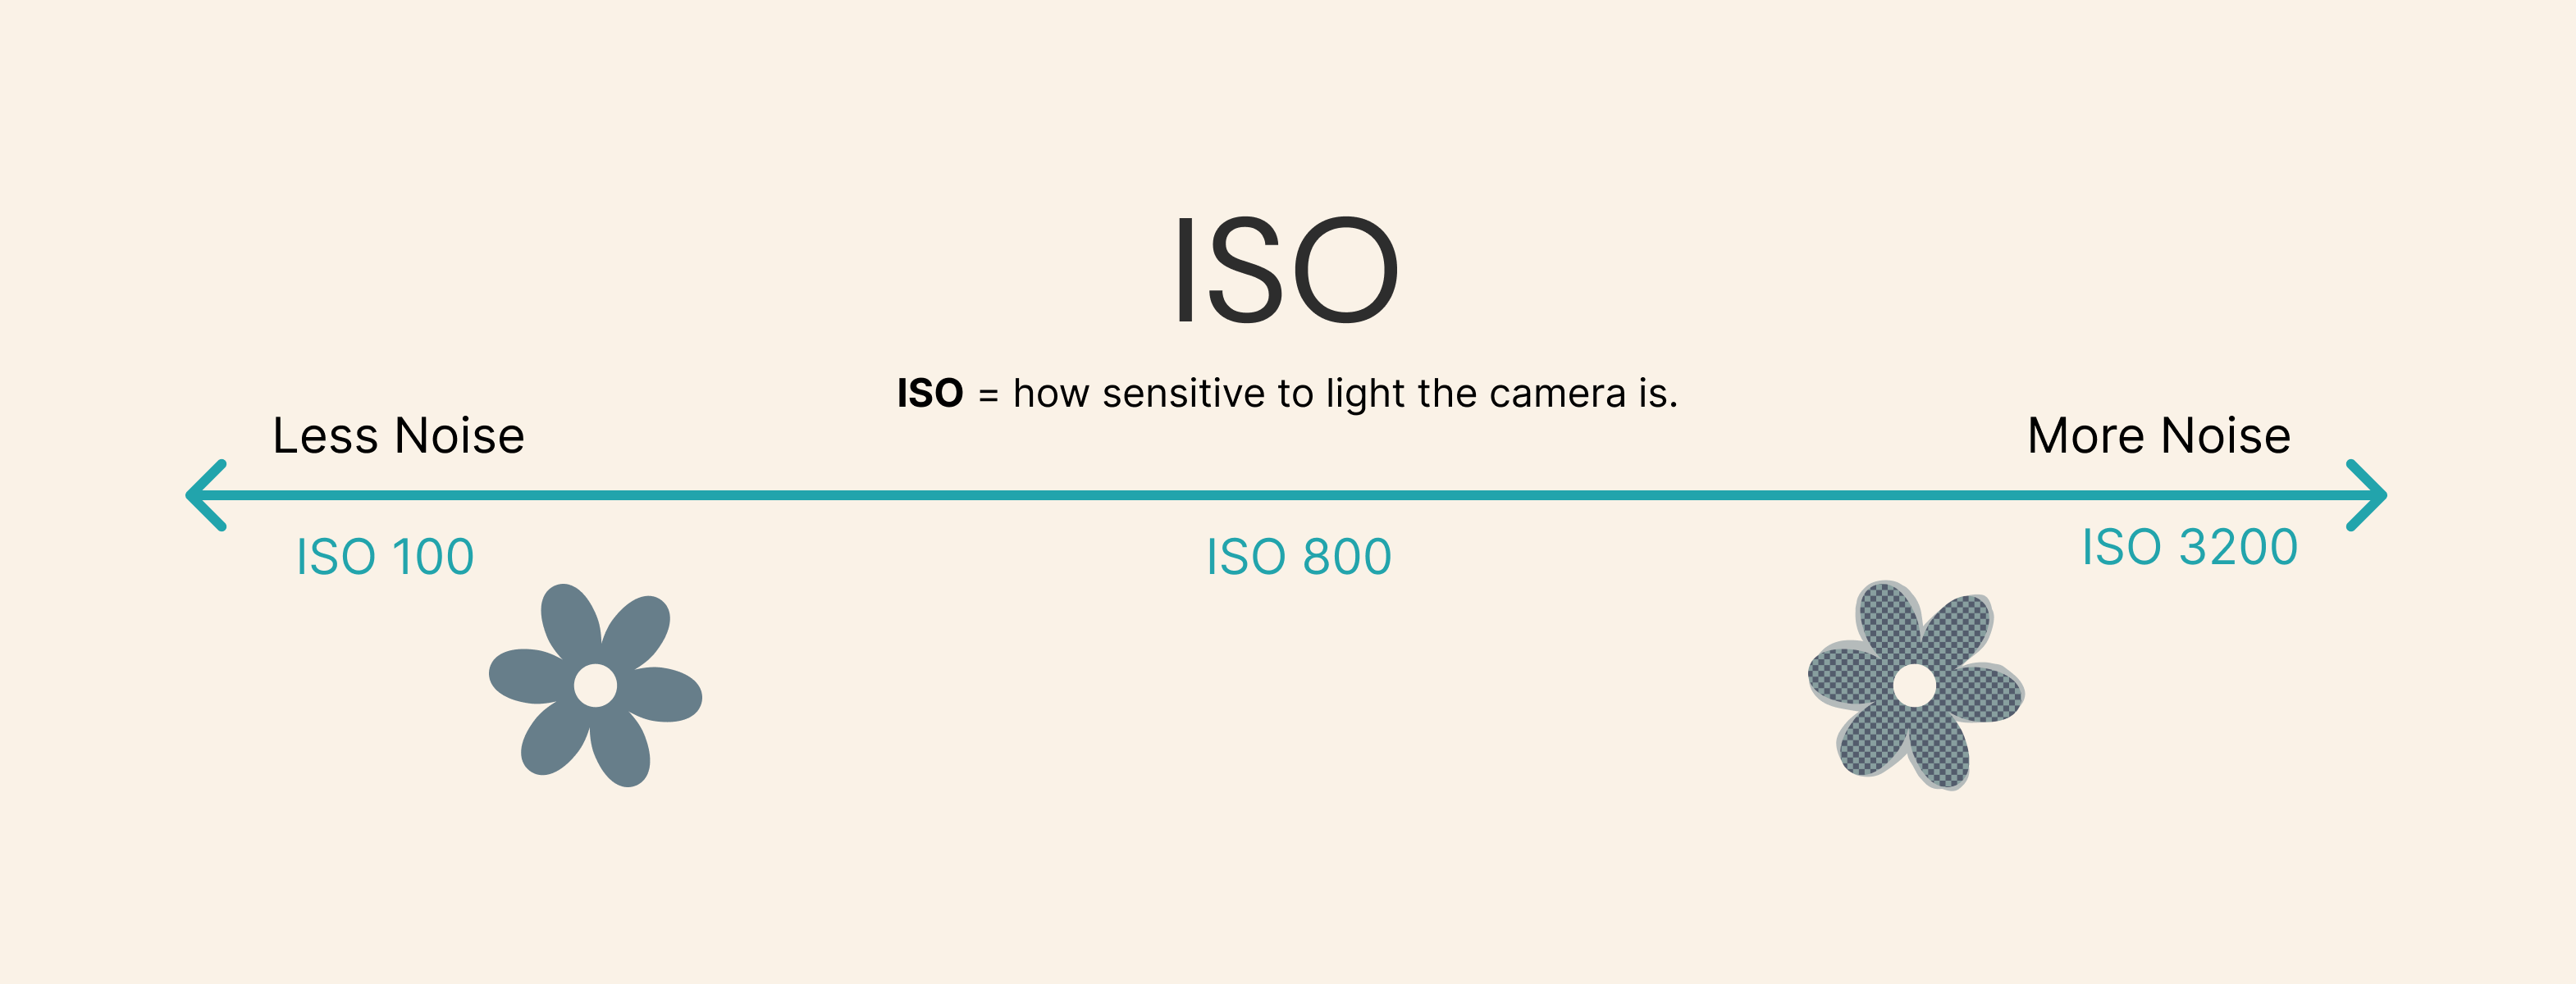
ISO is simply a measure of your camera’s sensitivity to light. ISO has a scale from 100-3200, or even higher on some cameras. The higher the ISO, the more light the camera lets in, and the brighter the photo.
So to take light and bright food photography, we want a higher ISO, right?
In fact, we want our ISO to be as low as possible. This is because as ISO increases, so does the grain or noise in our photos. So to take crisp, clean, food photos, you’ll want to keep your ISO low. I usually range from ISO 100 to ISO 400 depending on the availability of light and the aperture and shutter speed I want.
Putting it all together
Using a DSLR to its best capability is all about balancing aperture, shutter speed and ISO to get the optimum result.
The image below shows the exposure triangle. This highlights the delicate balance between all 3 settings.
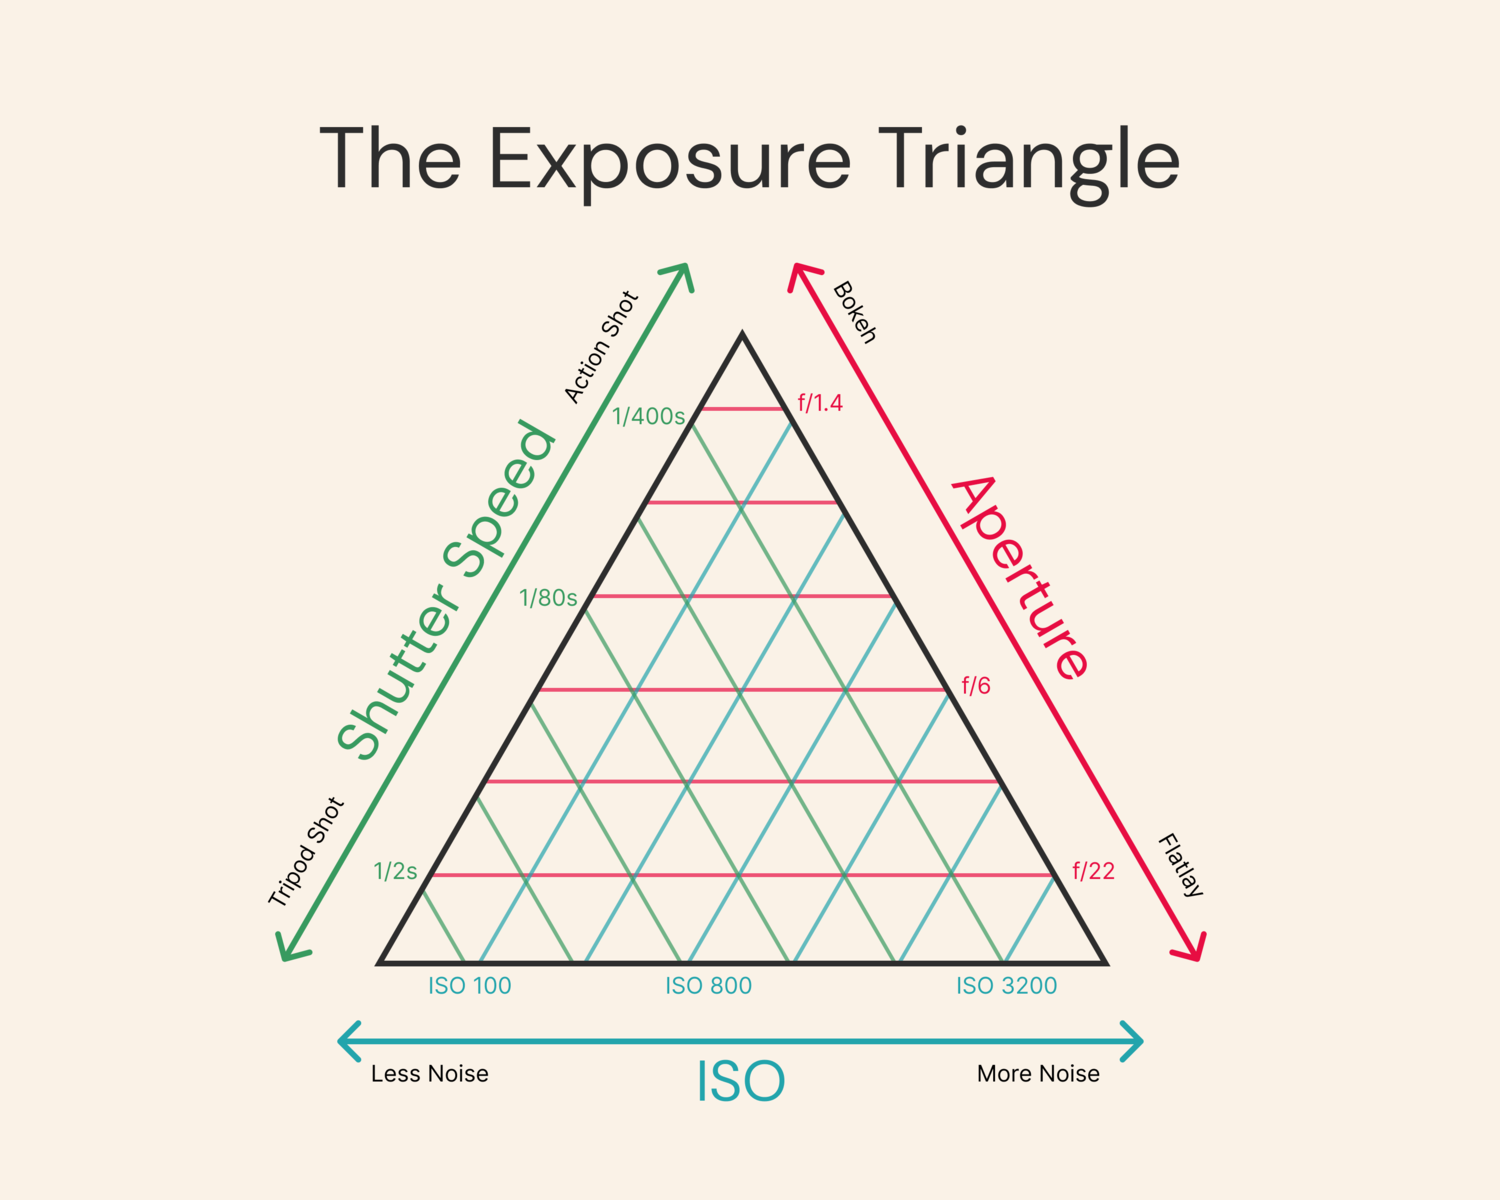
As you can see from the triangle, if you set one setting too high or low, you’ll need to compensate by setting another setting to the extreme. For example, a very narrow aperture of f/22 would require a VERY high ISO and a very long shutter speed, to ensure your photo is correctly exposed.
When deciding which settings to select, I use the following workflow.
- Set the aperture. As mentioned, I always set the aperture first as it is the only setting which has an artistic effect. If I am taking a flatlay, I’ll opt for a narrower aperture, or if I want more bokeh, I’ll opt for a wider aperture.
- Set the shutter speed. Shutter speed is the next important setting, and is influenced by whether or not you are using a tripod, and/or whether you are taking an action shot.
- Set the ISO. I always set the ISO last, as it is the least important of the settings. As a general rule, you want to keep the ISO as low as possible, so try to avoid setting it too high.
Final thoughts
Using your DSLR correctly comes with practice. Pick a simple subject and experiment with different settings to see the results. It may seem exhaustive at first, but soon enough you’ll be adjusting your settings like a natural!
If you are still unsure about some concepts, I highly recommend checking out Joanie Simon’s YouTube channel – it’s a gold mine for food photography tips.
I hope you enjoyed this article! You can check out the resources page on the blog for more fun content. Happy photographing!